Friday, May 15, 2009
Flux The Amigurumi Gremlin

Friday, April 24, 2009
My Little Tote Around
WW yarn CA & CB
Yarn needle
matching sewing thread and needle
Stitch marker
Sc= Single Crochet
Ss= Slip Stitch
Ch- Chain
St= Stitch
Notes: Bag is worked in the round, slip stitch to join rows. Mark the first stitch of each row with a stitch marker. Bag is about approx. 6 1/2" Long x 3 1/2" wide x 6 1/2" High.
Ch 15
Row 1: Sc across to last st, 3 sc in last st. Do not turn, Going across otherside of chain sc across to last ch, 3 sc in last. SS to 1st st. Ch 1
Row 2: Sc in same as SS, sc in next 12, 3 sc in next st, sc next st, 3 sc next st, sc in next 14 st's, sc in next , 3 sc next st, SS to 1st st. ch 1.
Row 3: Sc in same as ss, sc in next 14, 3 sc in next, sc next 2 st's, 3 sc in next, sc next 16 st's, 3 sc next, sc next 3 st's, 3 sc next, sc next 1, ss to 1st st. ch 1
Row 4-8: Sc in same as ss, sc across, putting 3 sc into the middle of ea of the previous 3 sc, making the corner. Join with ss to 1st stitch. ch 1.
Row 9-18: Sc in same as ss, sc across, join to 1st st with ss. ch 1.
End off CA and Join CB
Row 44: Sc around. end off. Weave in all ends.
Handles (Make 2)
With CA ch 6
Wednesday, January 7, 2009
Filet Crochet Graph

I could not find a graph that had a single cross on it, so I made my own up. I am making this as a gift for christmas. This is my first filet project. Feel free to use my graph. But do not copy it to anywhere else or sell it. I thought Filet would be harder. But its just Dc'ing and chaining, and skipping chains.
Monday, December 29, 2008
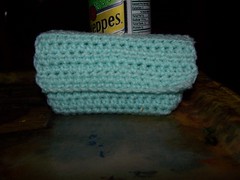
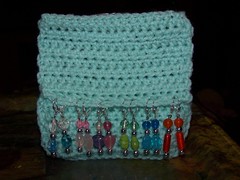
Stitch Marker Carrier
Materials used:
WW yarn
Size H Hook
Yarn Needle
ch 19
Row 1: sc in 2nd ch from hook and across. Ch 1 ,Turn.(18 sc)
Rows 2-11: Hdc across. Ch 1, turn.
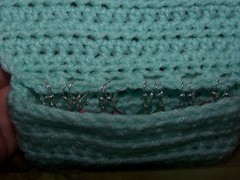
Row 12 a.: In FLO sc in first st, (Ch 2, sk 2 st, sc in next) across. (6 loops)Do not ch 1.
Row 12 b.: In the unworked Bl of same row, Hdc across. Ch 1 turn.
Rows 13-28: Hdc across, ch 1 turn. End off at row 13.
Fold flap under loops and crochet both sides closed. Weave in all ends.
You can make this longer or shorter by adding or subtracting rows. You can also add a snap or velcro to keep it closed, or even add something decorative to give it that extra mmmph!
If you find errors please let me know. Thanks. Enjoy!
Friday, November 21, 2008
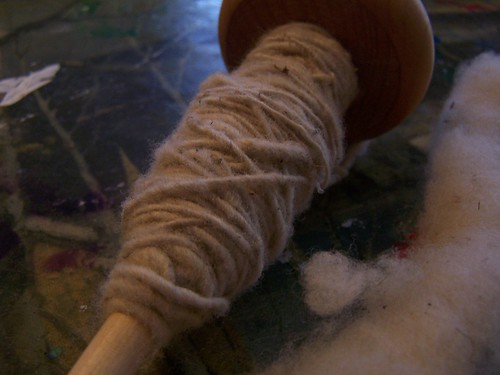
The End Results From My Spinning...
Saturday, November 1, 2008
Materials:
size 10 thread- any color
size 7 crochet hook
A pair of hook earrings (or you could use leverbacks too)
2 small to medium sized beads
2 Jumprings (optional)
Any type of stiffner
Stitches used:
DC- Double Crochet
Sc- Single Crochet
Ch - Chain
Sl St- Slip Stitch
Gauge does not matter, but you want to keep the same tension throughout both peices.
Before Starting: Before starting your chain or making your slip knot, slip the bead onto the thread. Tie a triple knot so it wont come off. Now, push the bead down to the knot. Holding the bead, wrap it around your hook and tie it on, but do not make a knot, instead, push or pull the tie down to the bead, that is the start of your chain.
Round 1: Chain 30. Sl St to 2nd ch from the bead making a ring around your bead. You should now have your bead hanging in the middle of the ring.ch 3
Round 2: Dc 44 times into the ring, sl st to ch 3.
Round 3:Now when you are done take your favorite way to block, and block your work. I used 50% water and 50% white glue. I laid them out on the blocking board and used a paint brush to soak them, turned them over and did the same thing. Then I pinned them into shape,and let them dry.
When dry Attach the jump ring to the chain 10 area and then onto the hook earring.
Quick And Easy Potholders
 Quick And Easy Pot Holders
Materials:
Size I Hook
Cotton Yarn
Yarn Needle for weaving ends
Stitches used:
Ch= Chain
Sc= Single Crochet
DC= Double Crochet
Rev Sc= Reverse Single Crochet
Sl St= Slip StitchSt= Stitch
Note: Pattern is done in the round.Each round is joined. Potholder is made in 2 parts, front and back.


